
Many people buy Office 365 subscriptions for the licencing flexibility, but then continue to use it exactly the way they would have their Microsoft Office 2016 or even earlier desktop licence.
Office 365 isn’t just your desktop in the cloud – Microsoft products and Office applications are packed with additional features that can increase your productivity, save you time and improve your writing. Keep on reading to find out our top Microsoft and Office 365 tips and tricks for 2019!
Unlike with a desktop licence, Microsoft release regular Office 365 updates as part of your yearly subscription. So make sure that you regularly download and have fully installed the latest versions of Word, Excel, Powerpoint, Onenote, Outlook and any other Office apps to benefit from their latest innovations.
Use Office 365 as a Free Digital Dictation Device
This is one of Microsoft’s best-kept secrets, particularly for lawyers and those regularly using paid digital dictation devices.
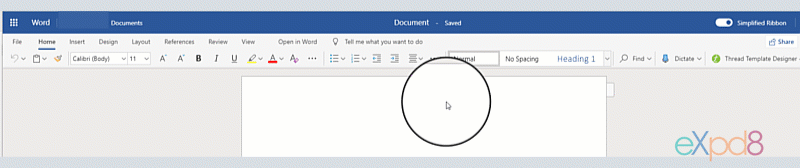
As long as your computer has a microphone, you can directly dictate into Word, Outlook, PowerPoint and OneNote for Windows 10. This should work on your tablet, PC or Mac. The text will appear on your screen. You can review and edit it in real time, or dictate a whole document and then review.
Got a microphone? Click Dictate and watch Word, Outlook, PowerPoint or OneNote for Windows 10 type while you talk.
- When you’re signed in to your Office 365 account, turn on your microphone and make sure it works (see Microphone settings).
- Go to Home > Dictate.
- Wait for the red dot to appear on the Dictate button and a quick sound will let you know that dictation has begun.
- Start talking. As you talk, text appears on your screen.
- Speak clearly and conversationally. Insert punctuation by saying the name of the punctuation mark you want to add.
- If you make a mistake while dictating, move your cursor to the mistake and fix it with your keyboard. No need to turn off the microphone.
- When finished, select Dictate again to stop typing.
RELATED: Microsoft Support For Windows 7 Is Ending Soon – Make Sure Your Business Is Protected
Co-Edit Documents with Word Online
If you are co-creating a document with colleagues, sending versions back and forth via email can be a real pain. Following Google Docs’ lead, Microsoft Office 365 now comes with similar co-editing functionality so that you can work with colleagues in real time on Word, Excel and PowerPoint documents.
The co-editing function is available in Word Online (not desktop Word). It should work on any device including mobile devices, tablets, PCs or Macs. If you also have Microsoft Teams, any documents that you upload to Teams can also be edited in the same way.
- When someone shares a Word document with you, the email you receive includes a link that opens the document in your web browser: in Word Online. Select Edit Document > Edit in Browser.
- If anyone else is working on the document, you’ll see their presence and the changes they’re making in online versions of the document. We call this coauthoring, or real-time collaboration.
- If you’d rather work in your Word app, select Edit in Word, near the top of the window. This will save any changes into your online version, but you will not be able to see other users within the document.
Listen to your text in Word and Outlook
Do you want to hear how your text flows, or just prefer to listen rather than read sometimes? Microsoft have upgraded their ‘Speak’ feature, now available in Office 365 as ‘Read Aloud’. It helpfully highlights the text as it reads it to you, giving you peace of mind that you will never lose your place.
In a Word document select Review > Read Aloud. In Outlook, select a message and click Home > Read Aloud.
Turn read aloud on or off in Outlook
- Select File > Options > Ease of Access.
- Under Application display options, select or clear the Show Read Aloud checkbox.

Let Outlook read your messages to you
- Open a document.
- Place the cursor at the beginning of the passage you want Word to read aloud. If you want to read the whole document aloud, place the cursor at the beginning of the document.
- Select Review > Read Aloud.
How to draw, write and highlight text in Office 365 using a tablet or your mobile device
Are you the kind of person who likes to print a document, highlight and scribble all over it? You can do this whilst saving paper (and the planet) with Office 365.
The ‘Draw’ functionality is available in Word, Excel and PowerPoint. You can choose different pen types for highlighting and drawing. You can also use a mouse, finger or device pen.

Use Office 365 Draw
- On the Draw tab of the Ribbon, tap a pen to select it.
In Word, you must be in Print layout to draw with ink. If the Draw tab is grayed out so that you can’t select a pen, go the View tab and select Print Layout.
In Outlook, first tap the body of the message and insert a drawing canvas ; then you can select a pen to draw with. - Tap again to open the menu of Thickness and Color options for the pen. Select your preferred size and color.
Quickly translate into multiple languages with Microsoft Translator
Whilst you may not want to use this for legal documents or big presentations, if you want a quick translation then Microsoft is there for you. Just highlight the text you want to translate, select the language and you’re there! Microsoft covers a large number of languages from Afrikaans to Yucatec Maya (a language spoken in Mexico and Belize).
The Translate feature is currently available for Word, Excel, OneNote, and PowerPoint. You can also get a translator add-in for Outlook in the Office store. See Translator for Outlook for more information.
Translate words or phrases in Word, Excel, or PowerPoint
- In your document, spreadsheet or presentation, highlight the cell or text you want to translate.
- Select Review > Translate.
- Select your language to see the translation.
- Select Insert. The translated text will replace the text you highlighted in step 1.
You might see a list of several translations. Expand the translated item to show a usage example in both languages. Choose the one you want and click Copy.

Make Sure Your Text is Accessible for All
Microsoft’s Accessibility checker ensures that your document, presentation or email is suitable for people of all abilities. It gives you specific suggestions of where you have failed to provide accessible information e.g. ‘alternative text’, which allows visually impaired people to understand the information contained in an image. For more information on this topic, see the Microsoft Support article Everything you need to know to write alt text.
How to Use the Office 365 Accessibility Feature
- On the ribbon, select the Review tab.
In Outlook, the Review tab is visible in the ribbon when writing or replying to messages. - Select Check Accessibility.
- Review your results. You’ll see a list of errors, warnings, and tips with how-to-fix recommendations for each. See Rules for the Accessibility Checker for more information.
- You can apply a one-click fix by selecting an action, or select the arrow button next to an action for more options.
To be notified of accessibility issues in your document as you continue working on it, tick the Keep accessibility checker running while I work check box. This adds the Accessibility button to your status bar and keeps track of accessibility issues in real time. You can open the Accessibility Checker whenever you want by selecting the status bar button.

Write better CVs and Corporate Profiles in Microsoft Word with help from LinkedIn
Microsoft acquired LinkedIn in 2016 and have launched a collaboration within Office 365. Resume Assistant is designed to help identify relevant skills, detail work experience and direct users to jobs they may be interested in.
Whilst you (hopefully) do not want your staff to be updating their CVs on company time, this feature can also be used to write and improve corporate profiles for tenders, promotional material and more.
Use Resume Assistant and LinkedIn for great resumes
Resume Assistant helps get your creative juices flowing by showing you examples of how real people — in the fields you’re interested in — describe their work experience and skills.
Start Resume Assistant
- Go to Review > Resume Assistant (The first time you do this, click Get started in the pane. This will help you download and install the assistant).
- Type the role you’re interested in, such as project manager, and optionally, an industry, such as computer software. Click See examples, and Resume Assistant shows you work experience descriptions to use as inspiration for writing your own description.
- Resume Assistant also shows top skills related to the role, as identified by LinkedIn. For ideas on how to weave pertinent skills into your descriptions, try filtering the examples by the skills you have.
- Resume Assistant shows open job opportunities that might interest you. Use the short descriptions for ideas on how to tailor your resume even further. When you finish editing your resume, click on these jobs to learn more or apply for the job. You don’t need a LinkedIn account to use Resume Assistant, although you can sign in to LinkedIn (or sign up for an account) when you follow a link from Word to the LinkedIn site.

Note: When you start a new document based on a resume template, Resume Assistant opens automatically.
Read more:
- The New Microsoft Office – One App To Rule Them All
- Next Generation Microsoft Surface Products
- The Benefits Of Office 365
Do you have any great tips that we’ve missed? Use the comments below to let us know!